Setup guide & help
Everything you need to get WebsitePusher running and pushing changes live.
Setup guide
Takes about 5 minutes from start to finish. You only do this once per website.
Install the WebsitePusher plugin on your live site
In your live WordPress dashboard go to Plugins and add a new plugin. Search for WebsitePusher, install it, and activate it. You will see a WebsitePusher item appear in your left sidebar.
Copy your website address and connection code
Click WebsitePusher in your dashboard sidebar. You will see your website address and a connection code. Click the Copy button next to each one and keep them handy for the next step.
Download and open the Mac app
If you have not downloaded the app yet, get it here. Once downloaded, open it. First time opening it? Right-click the app icon, choose Open, then click Open anyway. You only need to do this once.
Add your website in the app
Click the plus button to add a website. Fill in the fields shown below, then click Save website.
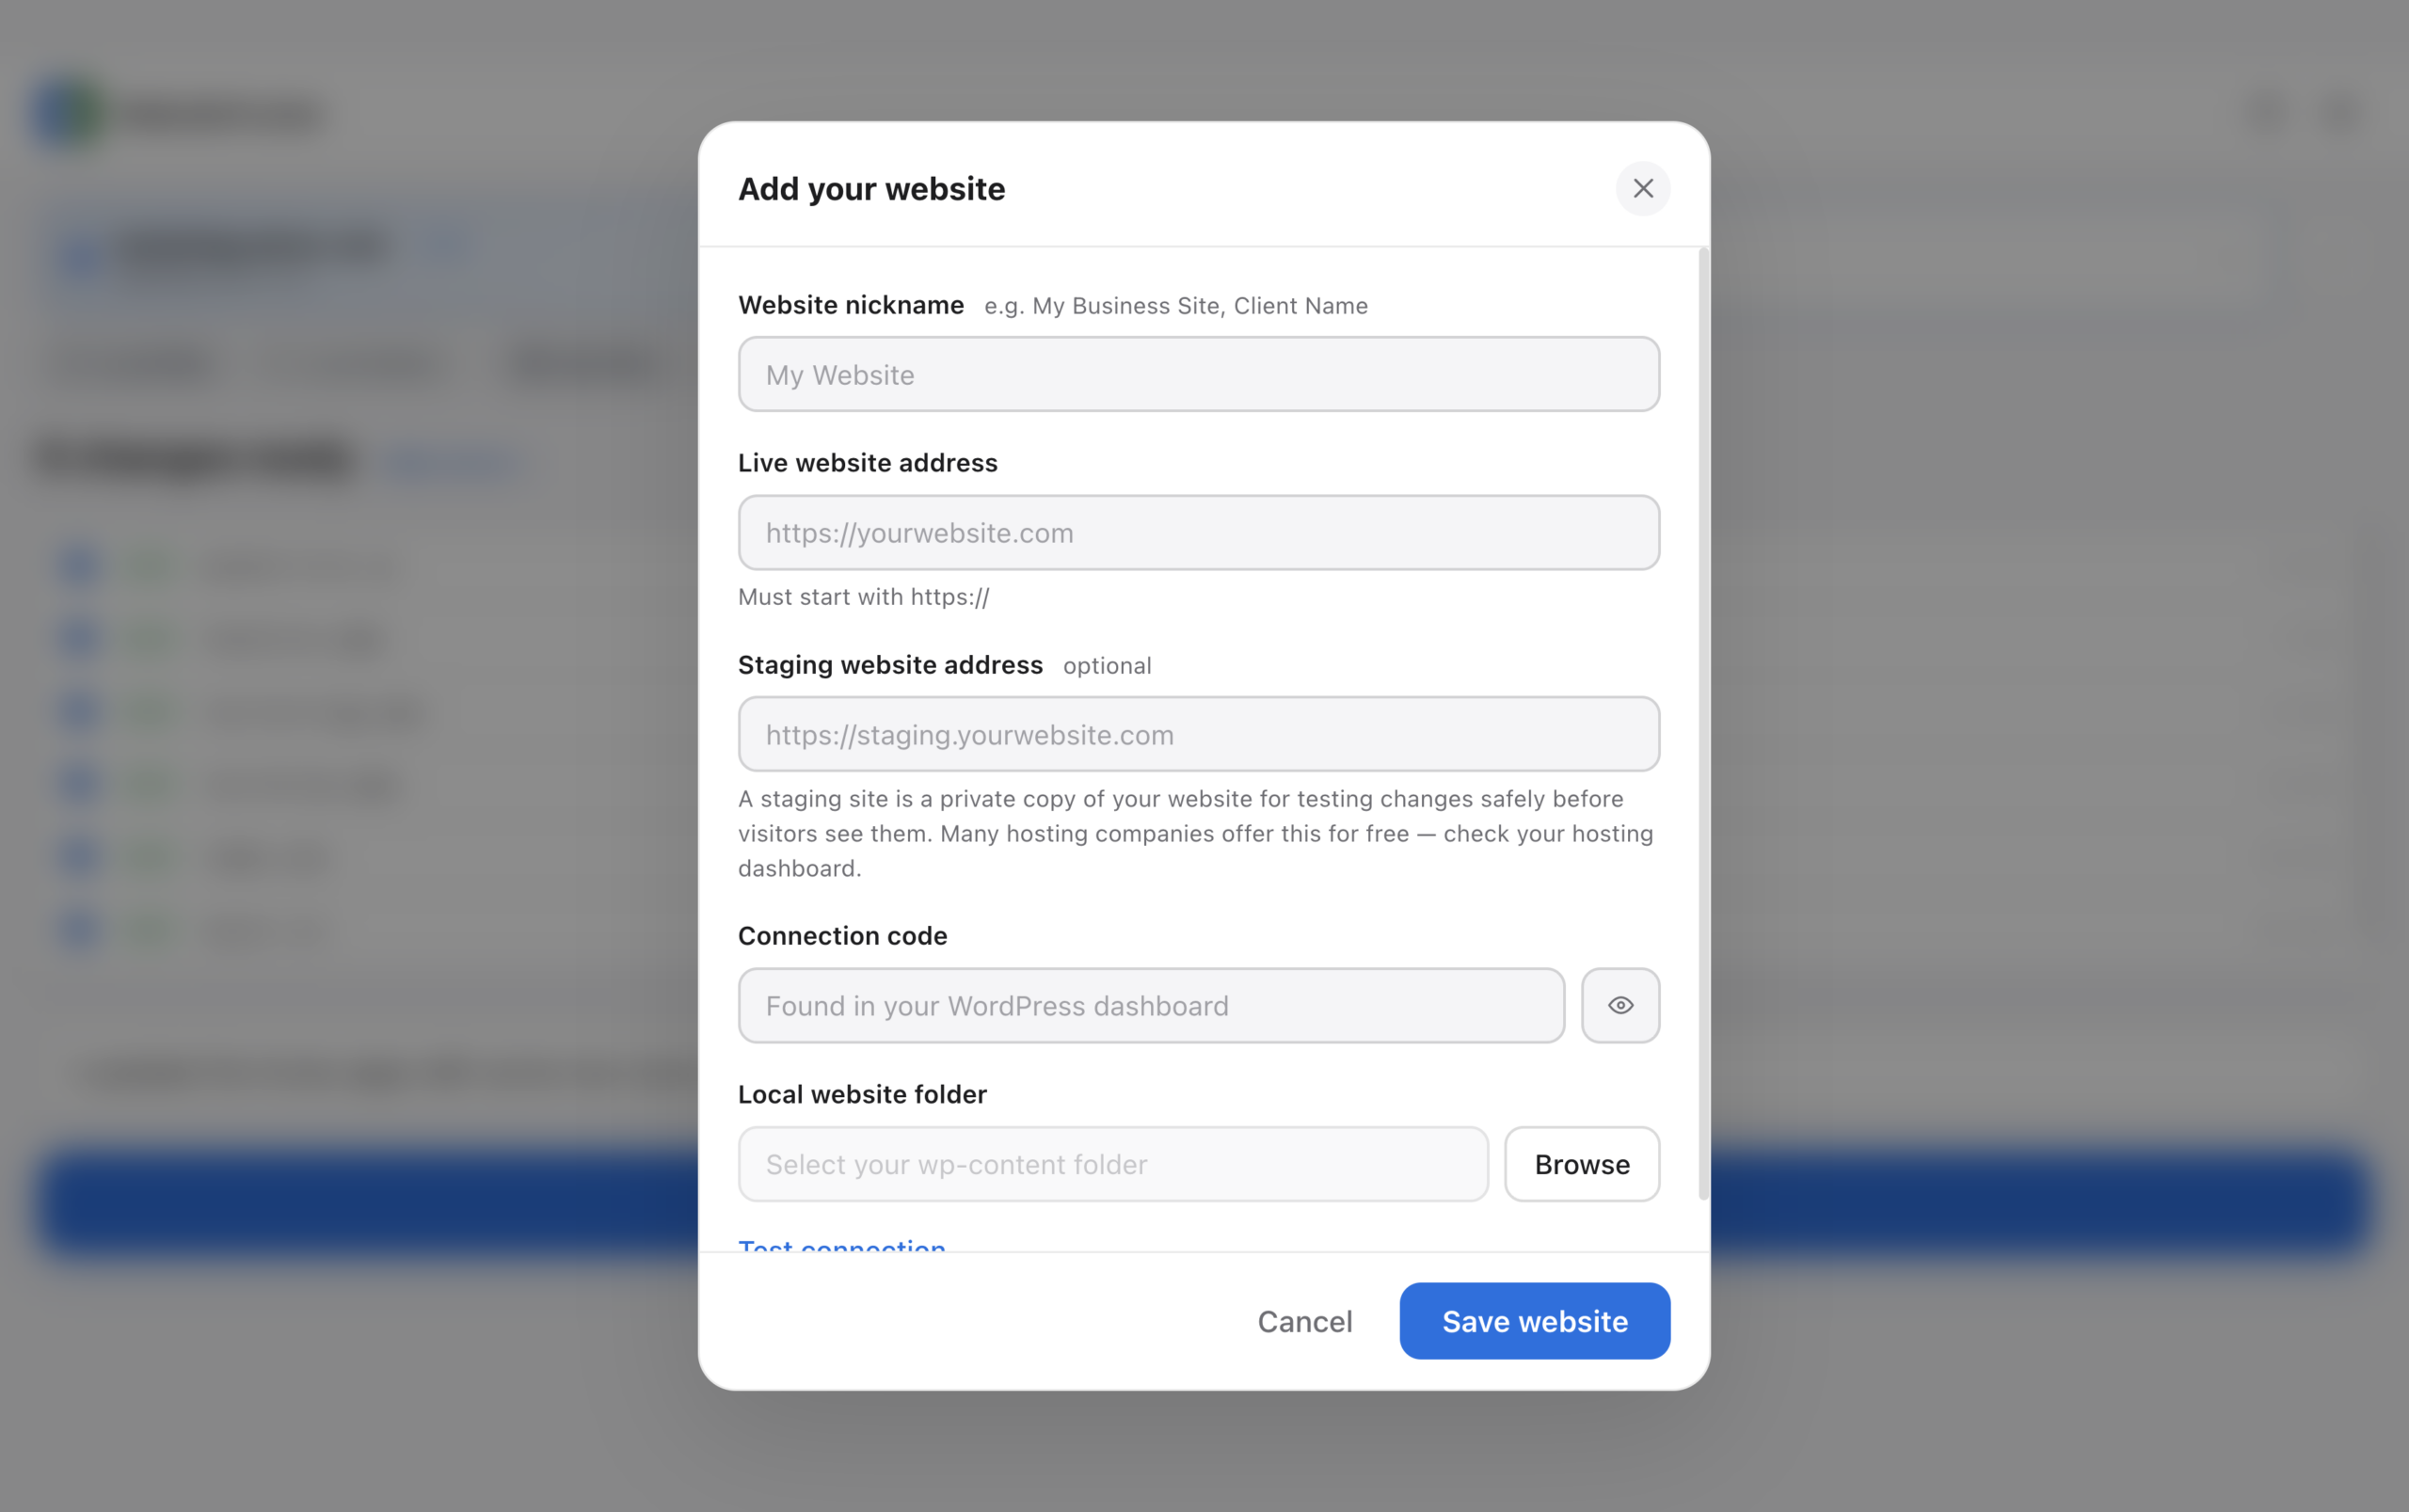
- Website nickname — anything you like, e.g. My Business Site
- Live website address — paste the address you copied from your WP dashboard
- Connection code — paste the code you copied from your WP dashboard
- Local website folder — click Browse and select the wp-content folder inside your local site
You are connected
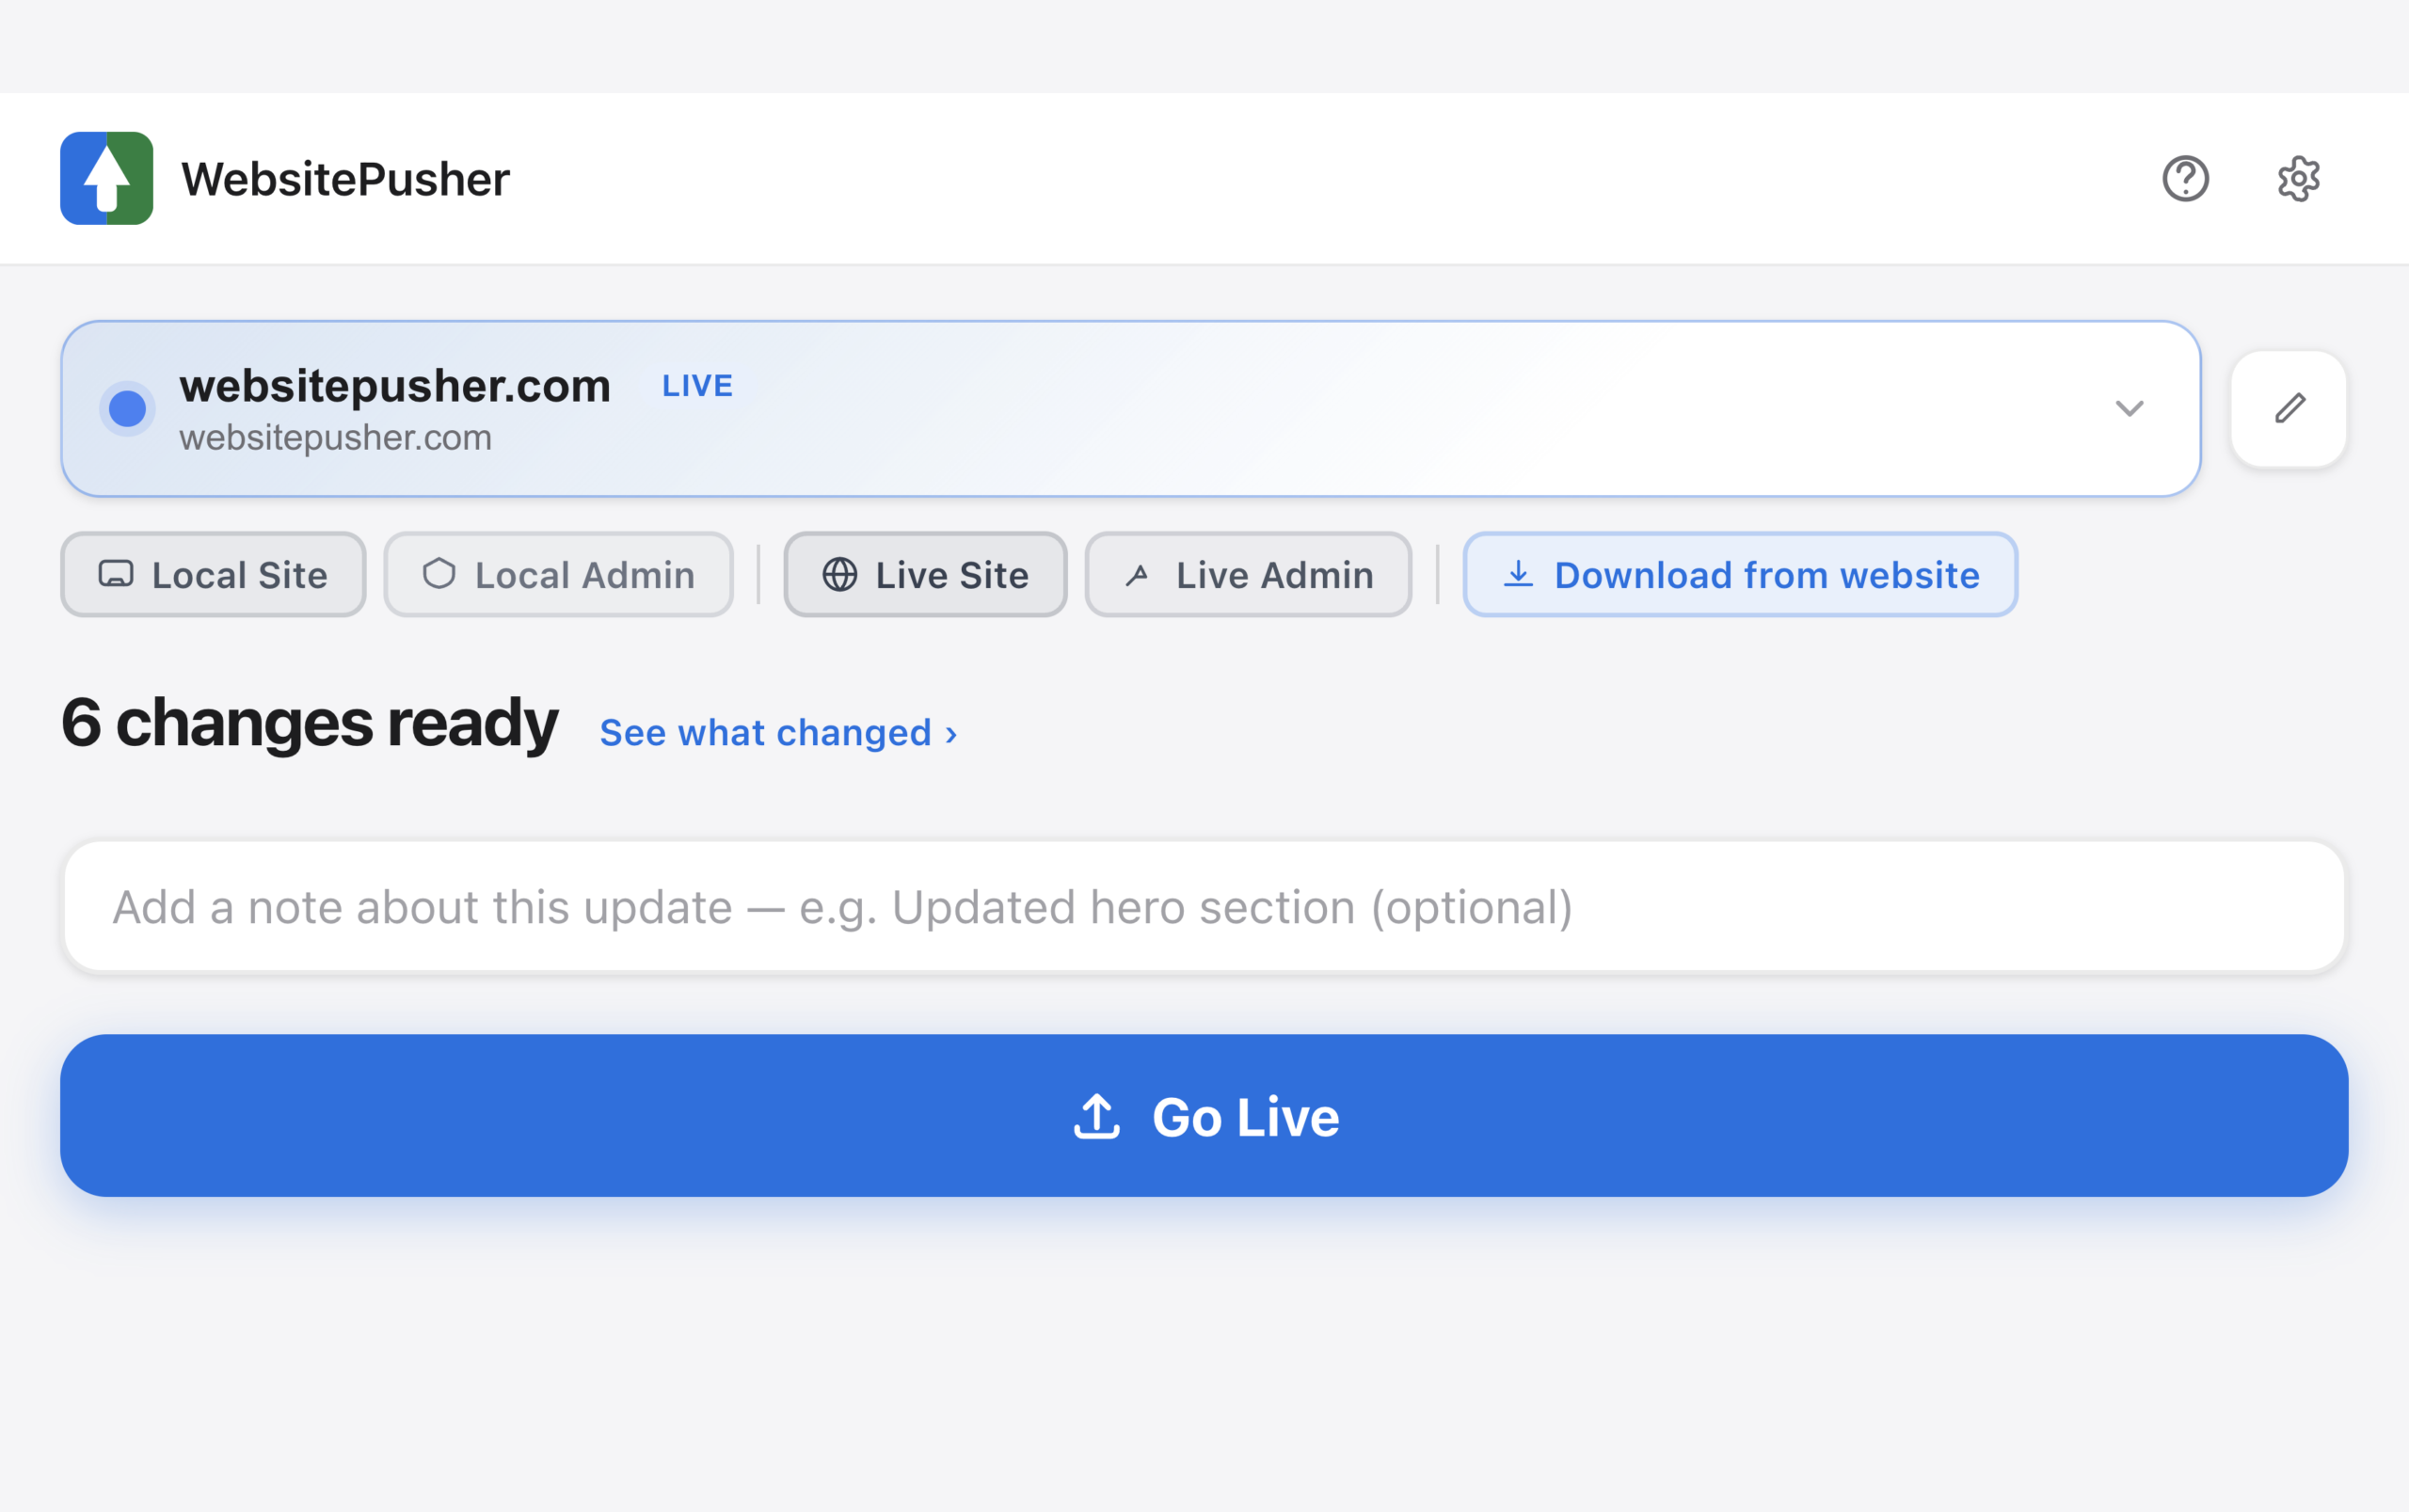
The app will show your site name with a green Connected badge. If you have made any local changes you will see them listed as ready to push.
Your first push
Ready to go live? Here is what happens when you click Go Live.
Review what changed
Click See what changed to see every file that is new or different. Check through the list so there are no surprises.
Add a note (optional)
Type a quick reminder of what this update includes. It gets saved with your push history so you always know what changed and when.
Click Go Live
WebsitePusher saves a full backup of your live site first, then pushes your changes. A health check runs automatically after.
If anything looks wrong
Click Undo in the app. Your previous version is restored in seconds from the automatic backup. No panic needed.
Troubleshooting
Connection
The app says Connection failed
Check three things: the plugin is active on your live site, the website address starts with https://, and the connection code was copied in full with no extra spaces. Try clicking Test connection in the app settings.
It says Connected but I see 0 changes
Make sure the local folder you selected is the wp-content folder inside your local site, not the root WordPress folder. The app compares files inside wp-content only.
Pushing
The push failed halfway through
Your site is safe. WebsitePusher made a backup before starting and will roll back automatically if it detects a problem. Check your internet connection and try again. If it keeps failing, email us.
My site looks broken after pushing
Click the Undo button in the app. This restores the automatic backup that was taken before your push. Your site will be back to normal within seconds.
Mac app
Mac says the app cannot be opened
This is a one-time Mac security warning for apps downloaded from the internet. Right-click the app icon, choose Open, then click Open anyway in the popup. You will not see this message again.
Still stuck? We will help.
Email us and we will get back to you as quickly as we can. Tell us what you were trying to do and what happened and we will sort it out.
Email support@websitepusher.com